What is a “flow”?
The central element of Chioro are “flows”. A flow describes a data flow - from raw source data to prepared product data.
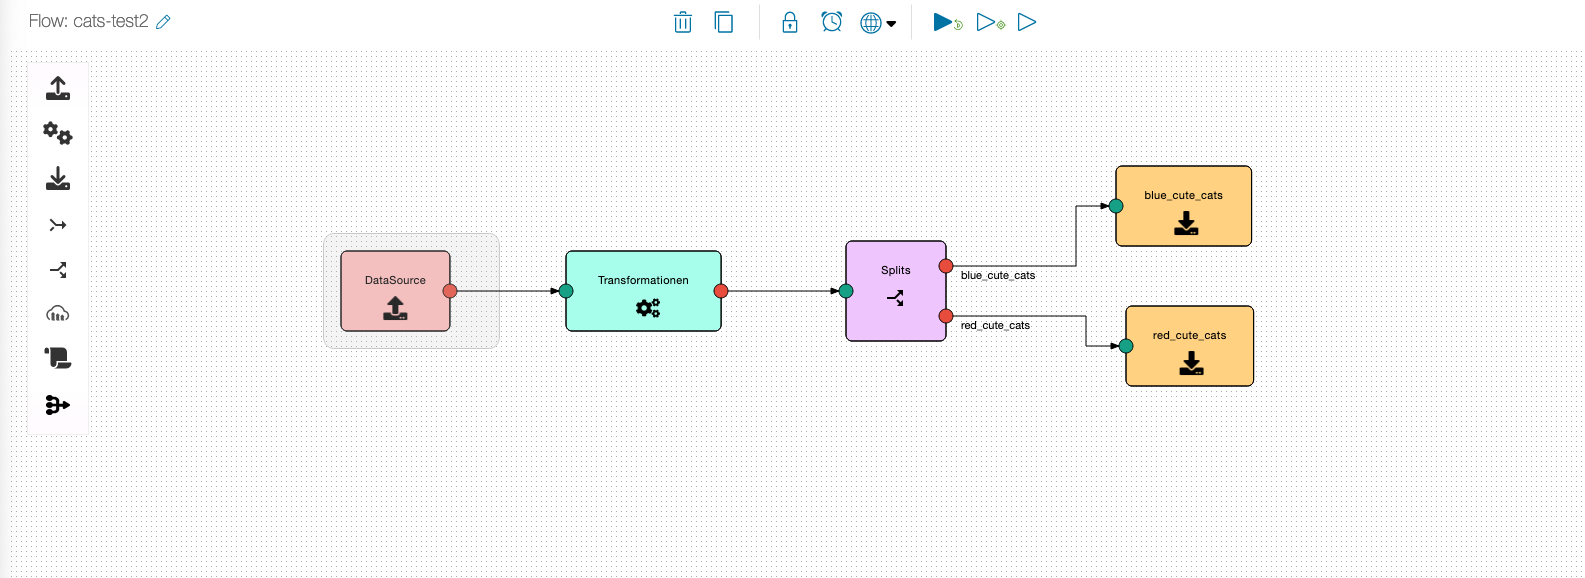
Each flow starts with (at least) one data source and ends with (at least) one data destination. On the way from the data source to the data destination, the product data is transformed, linked, processed, filtered, enriched, … using Chioro’s Flow Operations).
A flow is first created (in the Flows workspace), tested and refined. This can be done step by step. Once it is defined, it is started either manually, time-controlled or via API call. (here an API documentation is created )
Idempotency
A flow is the conveyor belt that moves product data from one processing station (i.e., one flow operation) to the next. And because these stations are rule-based, a flow can be executed over and over again.
Either on the same data - e.g. after a change to the flow itself. Or on changed data - e.g. on a new version of a product catalog. In any case, the results are always reproducible: the same input data, with an unchanged flow, always leads to the same output data. No matter how often the flow is executed. This property is called idempotency. (By the way, it applies - logically - not only to the whole flow, but to every single operation).
Data Exploration
A special feature of Chioro is that the product data on its way through the operations (by default) is cached in a searchable database after each operation. This helps enormously in developing flows and debugging. More about this in the section Data Evaluation.
Within one Chioro client several flows can coexist to consolidate e.g. independent product data streams. For example, from different suppliers. Or, in a marketplace, from different marketplace participants.
Manage flows
Flows are managed in the tabular flow overview. You can get there by …
- clicking on the Chioro logo in the top left corner of the header, or
- click twice on the workspace Flows in the header, or
- a click on “Back to overview” (if available) at the left sidebar
Overview of all flows
The flow overview shows all flows created in this client. A click on the name of the flow opens a detailed view with all operations of this flow.

- name of the flow
- time of the last change to the flow
- number of existing flow operations
- number of data records
- time of the last data export
- automatic execution of the entire flow
- actions (edit flow, export, remove, …). See below.
- the list of operations in this flow.
- the name of the operation with the number of records it outputs.
- the type of operation.
- some information about the operation.
- time of the last execution.
- time of the last change (of the definition).
- the status of the last execution (successful, error, …).
- the actions related to an operation.
Meaning of the sysmbols for actions:
-
. Import a locally stored flow (e.g. to upload a flow created by us, on behalf)
 -
 Export a flow(or single flow operation) to send them to our support for example.
 -
 Customize how many flows are displayed per page.
 -
 Help for each topic.
 -
 Delete flow or flow operation.
Meaning of the icons for the status of the last execution of an operation:
-
 The operation was executed without errors.
 -
 The operation was executed with errors.
 -
 The operation has never been executed.
Create new flow

- Click plus button.
- Assign a unique name for the flow.
- Click on “Save”.

Every flow needs at least one data source. Therefore, after creating the flow, the hint appears that a data source is needed. Clicking on ‘ADD NEW DATA SOURCE’ creates such a source and opens the Flow workspace directly.
The graphical flow editor
The graphical flow editor is a central element of the Flows workspace. Here, flows can be visually “stitched together” by dragging flow operations from the left into the canvas and connecting them with arrows. The data then flows along the arrows from the data sources to the data destinations as the flow is executed, using the flow operations in between.
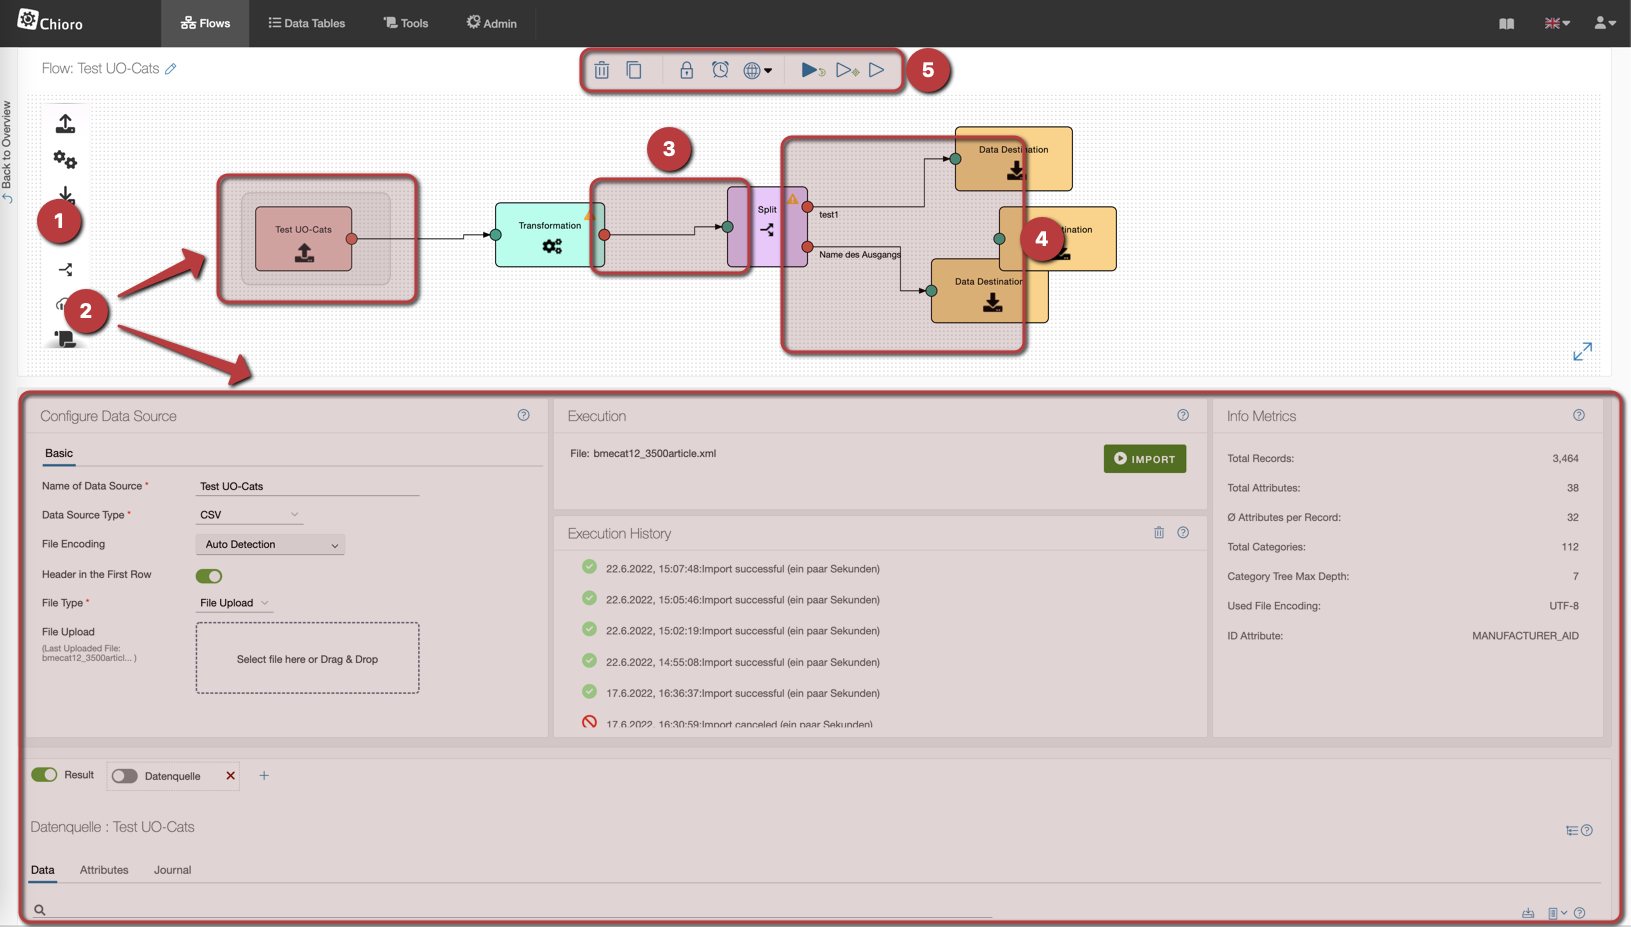
- Data sources, data destinations and other operations can be added to the flow by drag & drop. The yellow border indicates which operation is currently selected. Its properties and data are displayed in the Operations Editor and Data Evaluation areas below the Flow Editor.
- The view in the Operations Editor changes depending on the selected flow element.
- Clicking on a red point (data output) and dragging to a green point (data input) connects two operations. The product data then flows in the direction of the arrow from one operation to the next as it is executed. Some operations have multiple inputs or outputs. For example, to merge data from multiple sources or to send products to different processing branches.
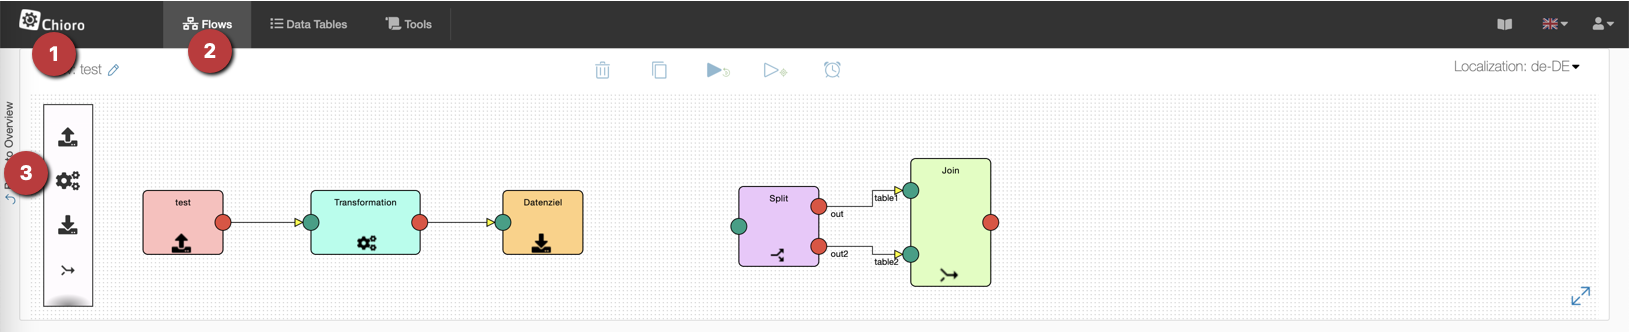
- There are flow elements with more than one output or input.
- In the flow editor there are several actions available for the flow or individual operations:
-
. Delete operation
 -
 Clone operation - Operations from other flows can be cloned. This way, identical operations do not have to be created again.
 -
 Zugriffsrechte konfigurieren.
 -
 Configure time triggers - Times at which a flow should be executed can be defined, e.g. "Every weekday at 10am".
 -
 Choice localization.
 -
 Start flow - The flow will be executed.
 -
 Start flow from here - The flow will now be executed from the mark.
 -
 Start selected element
-
Trigger
It is possible to execute a flow at a specific time. To make this possible, a trigger can be set up to execute the flow cyclically at a fixed time.
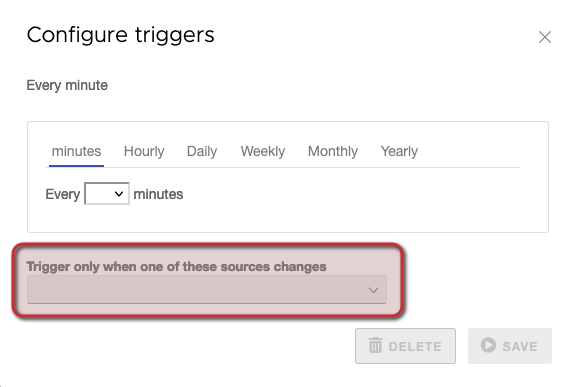
To get to the view, click on the “Clock” above the flow editor. This opens this window:
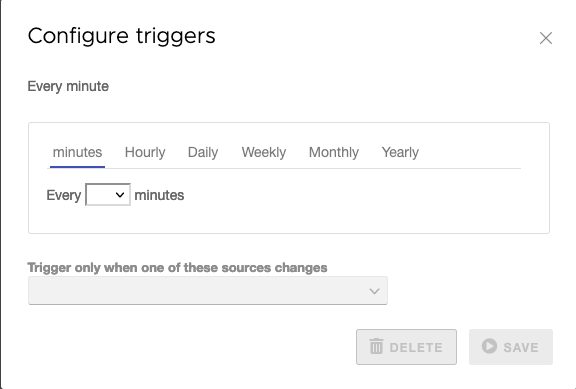
As you can see, there is the possibility to execute the flow every minute, every hour, every day, every week, every month or every year. Furthermore, you can set additional time conditions, depending on which tab you are in.
In addition, the execution of the flow can be made dependent on whether source data has changed since the last execution. For this, one or more data sources can be specified in the trigger configuration. For these data sources, the (change) timestamp of the underlying source file is checked at the trigger times. Only if at least one of these source files has changed since the last execution, the flow will be executed.
Access Rights
It is possible to configure access rights for a flow. To get to the view, click on the “Lock” icon above the flow editor. After that this window will open:
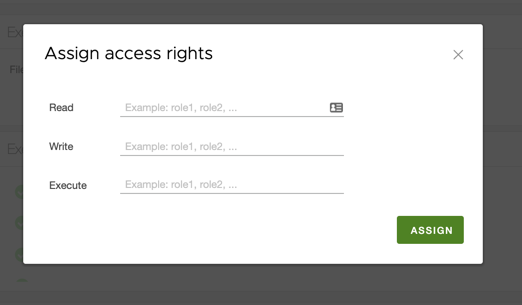
Further information can be found under Benutzerrechte