By now it should be clear that the data processed in Chioro is short-lived. The results are stored temporarily to allow analysis and interactive work. However, there is no guarantee that they will be preserved forever. In certain cases, it might be useful to have persistent tabular data that can be used in Chioro and this is the main feature of Data Tables. Unlike the other data in Chioro, Data Tables are a persistent mechanism for storing certain types of data that can be accessed globally.
There are two ways to create Data Tables. Firstly, each result view can be exported as a Data Table. Secondly, a new Data Table can be created manually.
Creation of Data Tables
Due to their flexibility and a variety of use cases, many screens in Chioro offer the ability to create Data Tables on the fly. The following is a list of all possible options in Chioro that can be used to create Data Tables:
- click on the following button in the Data Table menu:
 .
.
This way a new empty Data Table will be created. - click in the menu Data table on the following button :
 .
.
This will create a table with the same functionality / configuration as a data source. - click on attributes on various pages on the following button :
 .
.
This will create a single column Data Table with the name of all attributes. - click on attributes on various pages on the following button :
 .
.
This will create a single column Data Table with the unique values of the selected attribute. - click on result on various pages on the following button :
 .
.
This will create a copy of this data as a Data Table.
The Data Tables view can be found as follows:
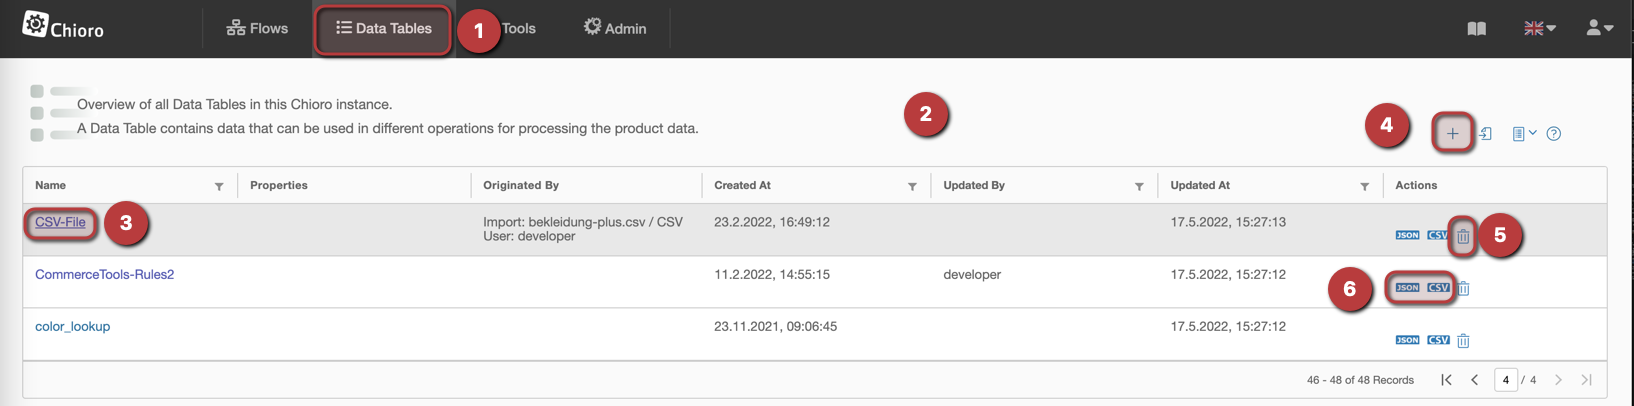
1. Menu item Data Tables
In the navigation guide, the menu item Data Tables navigates to the Data Tables overview.
2. Data tables inventory
All the available Data Tables are displayed line by line. It also contains information about the source/origin of the data in the table.
3. Edit Data Table
To edit the Data Table you can click on the name, this will open the following view:
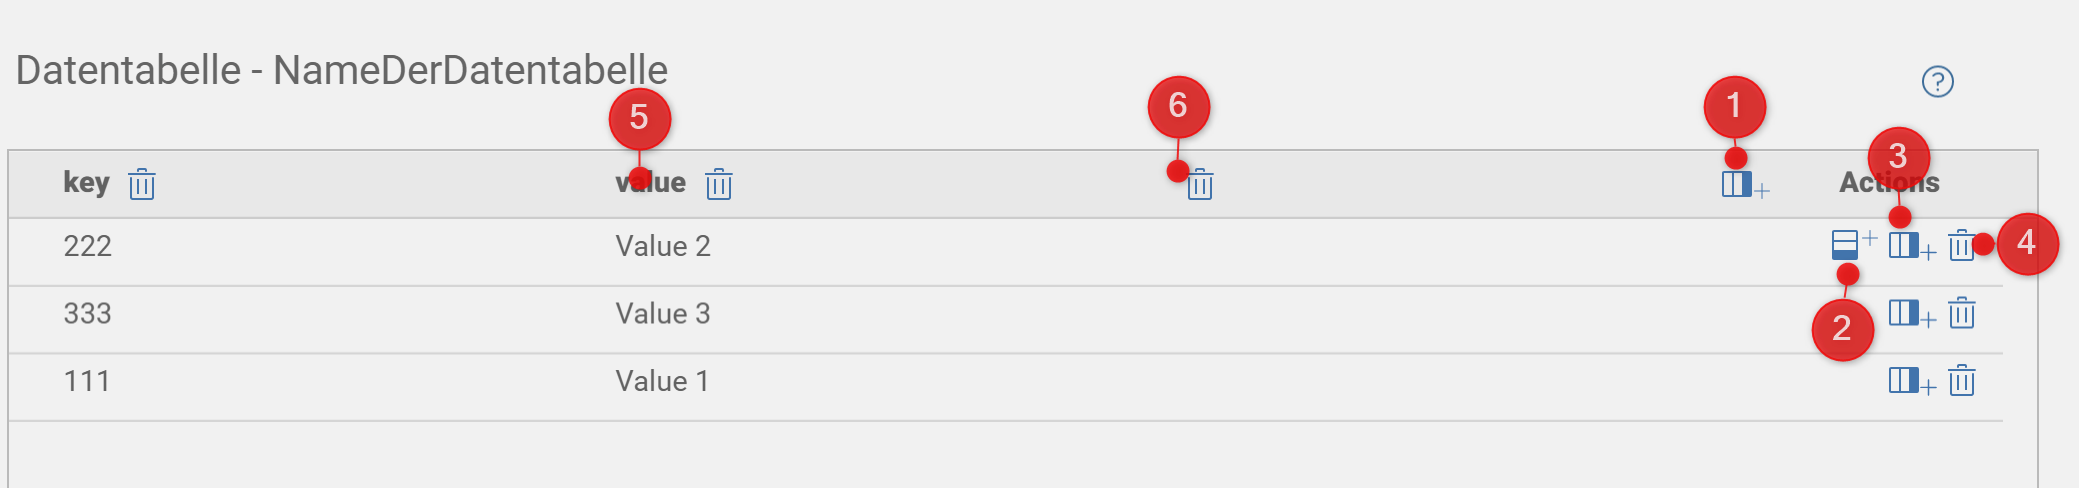
Columns in the table that consist of nested objects (e.g. JSON import with nested objects) cannot be edited. Also the column name cannot be changed.
The following options are available:
- add columns
- add row below
- add row above
- remove row
- edit column name by double-clicking on the column. The column name is now ready for editing. The ‘Enter’ button confirms the change.
- remove column
- edit value by double-clicking on the value. The value is now ready for editing. The
Enterkey confirms the change.
4. Add Data Table
With the plus symbol a Data Table is added. A new section opens above the plus symbol, in which a name for the Data Table is defined. The ‘Enter’ key confirms the new name. Furthermore it is possible to create a new datatable after click on the save button. The window closes and the Data Table inventory is displayed. Now you can work with the new Data Table.

5. Delete Data Table
The Data Table can be deleted here.
6. Other Actions
Action buttons to export the data table to different formats.
Assign access rights for datatables
To edit the access rights for data table you can click on the name and then on the “Lock” icon.
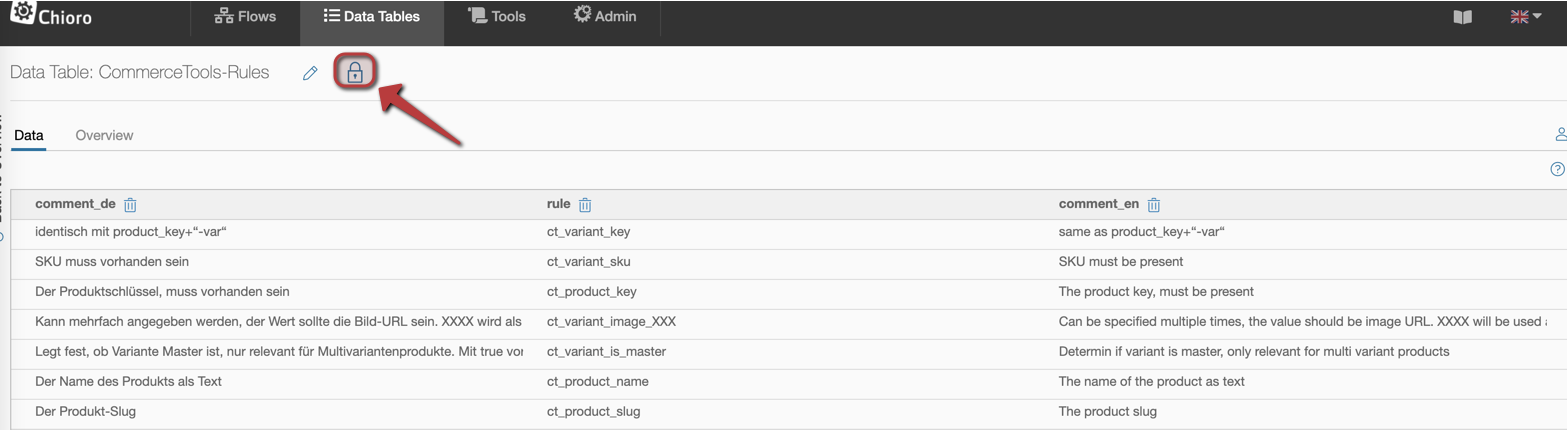
Further notes on the configuration of access rights can be found under permissions.